First you will need to decide what kind of effect you want to achieve. The more different the colors, the more dramatic the stripes' effect will be.
One of my favorite effects is the one color gloss/matte stripe. You use the same paint color, just different sheens. It is very subtle, but oh so classy! I have this effect in my master bedroom. Here is an example Ifound online:
Another option is for you to choose "sister colors" which, in my language, means colors that go really well together and are not too different of each other, such as 2 pinks, one maybe just a little darker than the other. Here is an example in my little girl's nursery:
Or you can just choose 2 different tones of one color, going for the most dramatic effect. In my little boy's room I chose the colors from his bedding set. Here is how it turned out:
Okay, so after you have chosen the effect you want to achieve, here is what you will need:
- 2 colors/sheens of paint: I recommend you getting more of the flat one (if you are going for the glossy/matter effect), since it is cheaper. The shinier the paint the more expensive!
- Painters Tape: I recommend the 1 inch 3M Painters tape you can get either at Home Depot or Lowes.
- Pencil
- 3 foot level and ruler
- LOTS OF PATIENCE (glasses too, if you have a hard time seeing the pencil...)
Here are the steps:
1. Choose one color as the base coat. I usualy use the paint that is flat, since it is cheaper. ALWAYS do 2 coats. Trust me, doing 2 coats takes more time, but, oh, is 1 coat ever soooo noticiable, and NOT in a good way, especially if you are using dark colors like red or brown.
2. Choose the width of the stripe. I usually do 6 inches, but you can choose to go wider or narrower. Here are 2 examples I found online:

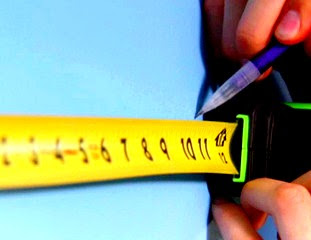
3. Once you decided your width, start at the edge of a wall. Using the ruler mark the width of your first stripe, then use the level to draw your vertical line (it is very important to use a level so your lines are straight).
4. After you are done tracing all the stripes, its time to tape! FUN! VERY IMPORTANT: cut a small piece of tape and put it in every other stripe to mark the ones you WILL NOT PAINT. Follow the line as you tape making sure the tape is INSIDE THE STRIPE YOU WILL NOT PAINT. It will look kind of like this:
5. To avoid bledding of the top coat, using a brush seal the edges of the tape OF THE STRIPESYOU WILL PAINT with the base color. After it dries, you are ready to paint your top coat.
6. Using a small roller (easier to stay inside the lines) paint the stripes with the top coat. Again, 2 coats is recommended.
7. Final word of advice: take the tape off BEFORE the top coat is completly dry to avoid peeling!
And you are DONE!
ENJOY!!!!!!
Email me if you have any questions!


